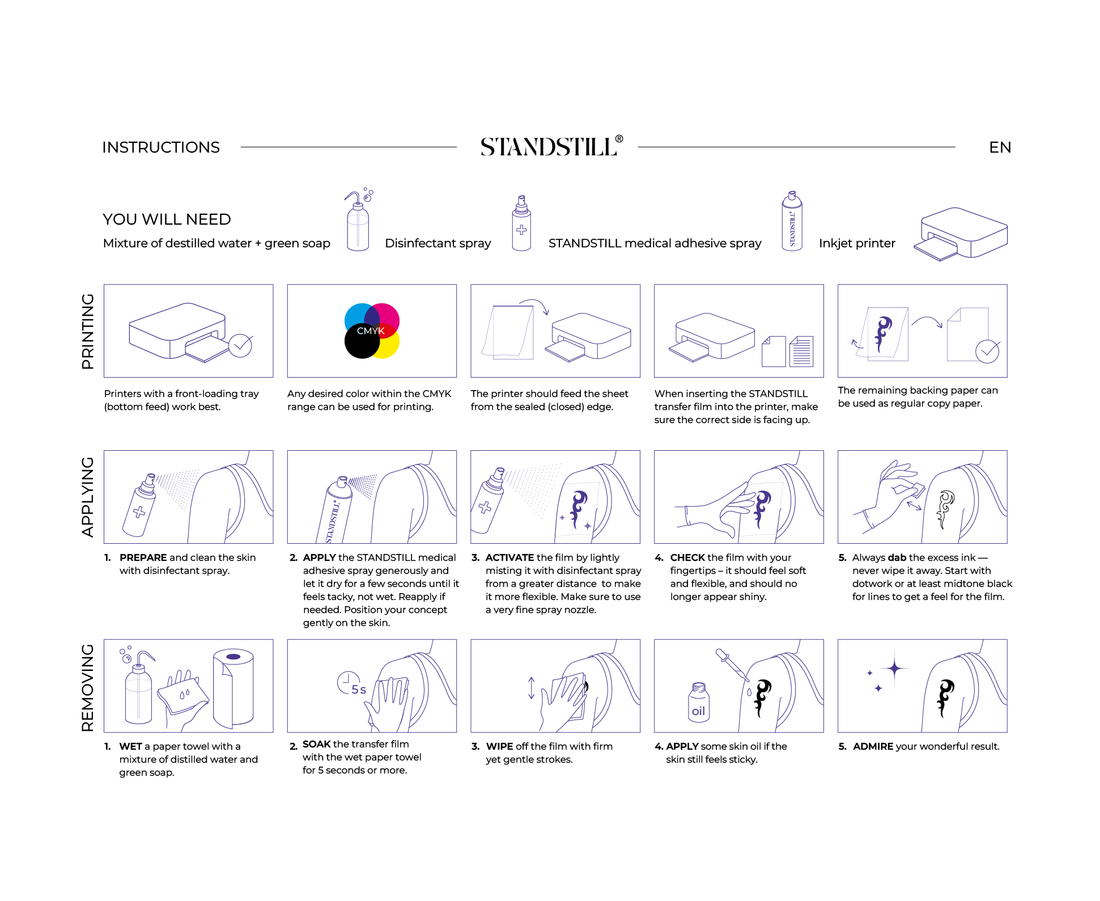
Instructions – Here’s How to Use STANDSTILL
👉 You can download the Instructions here
Like with any new tool, it takes a little practice to get started. Just like an artist needs to test a new brush before it flows naturally, you’ll need to get a feel for how STANDSTILL works.
Experiment, explore & enjoy the process!
PRINTING
Note: Printers with a bottom paper feed work more reliably!
- Only insert one sheet at a time. And leave a stack of normal paper in the tray.
- The printer must pull in the sheet from the sealed edge.
- Place a small word at the upper edge of the page, to ensure the print starts evenly from the top and the sheet isn’t skipped.
- Avoid borderless printing.
- If the film still gets wrinkled up, you can try taping all sides with some tape.
Top-loading printers work better if you insert the sheet with the open edge, not the sealed edge. Tape the open edge for more stability.
APPLICATION
- Make sure the entire film is adhered firmly, including every corner.
- Allow the adhesive to set for a few seconds before placing the film – a surface that is too wet can cause ink to slip under the film. If that happens, you can try to re-apply.
- The fine spray nozzle for the activation of the film is key!
TATTOOING
- Begin with smaller needle sizes and work your way up; we recommend up to 9 RL.
- Start with dotwork to get a feel for the material, then gradually move on to lines.
- Don’t use pure black at first – light to midtone black works best during the adjustment phase. Early outlines may look like they were sketched with a hard pencil, which is normal.
- Increase your machine’s voltage by one or two volts if needed.
- Vaseline makes the film temporarily water-resistant, preventing ink droplets from dissolving it, and helps the needle glide smoothly through the film.
APPLYING & TATTOOING